If you’ve ever done accounting work for clients, you’ve probably faced some roadblocks when you are trying to import a bank statement to NetSuite.
Maybe the client’s bank doesn’t offer bank feeds, or their transactions aren’t available in CSV. Worse yet, some banks only provide PDFs of their statements, leaving you stuck with the tedious task of manually entering data into NetSuite.
These kinds of roadblocks are annoying and will slow you down. It’s a window to the risk of mistakes, and it can even force you to hire extra help to get the job done.
It’s inefficient, time-consuming, and, frankly, a hassle.
In this article, I’ll show you how to import bank statement into NetSuite including invoices and receipts.
Also, we have more guides how to import bank statements into different software:
- Import bank statements into QuickBooks
- Import bank statements into Sage
- Import bank statements into Xero
Step 1: Select PDF Converter for NetSuite
The first thing you need to do is pick a OCR converter that works well with NetSuite. You have to pick one carefully because NetSuite has strict formatting requirements for spreadsheets. If the format isn’t right, the software won’t assign your data correctly.
The perfect tool for the job is DocuClipper.
DocuClipper is built to handle these specific needs. It comes with a variety of presets for CSV formats that are compatible with NetSuite and other popular accounting software like QuickBooks, Xero, Sage, and Quicken.
To get started, visit the DocuClipper website and sign up for an account. If you’re still on the fence whether it’s the right fit, you can explore its features with its free trial.
Once your account is ready, you’re set to start uploading and converting your files with ease.
Step 2: Upload Your PDF Files to DocuClipper
After setting up your DocuClipper account, you’re ready to start uploading your PDF files.
On the homepage, you’ll see options for processing various types of financial documents, such as bank and credit card statements, invoices, receipts, brokerage statements, and checks.
For this example, let’s focus on bank statements.
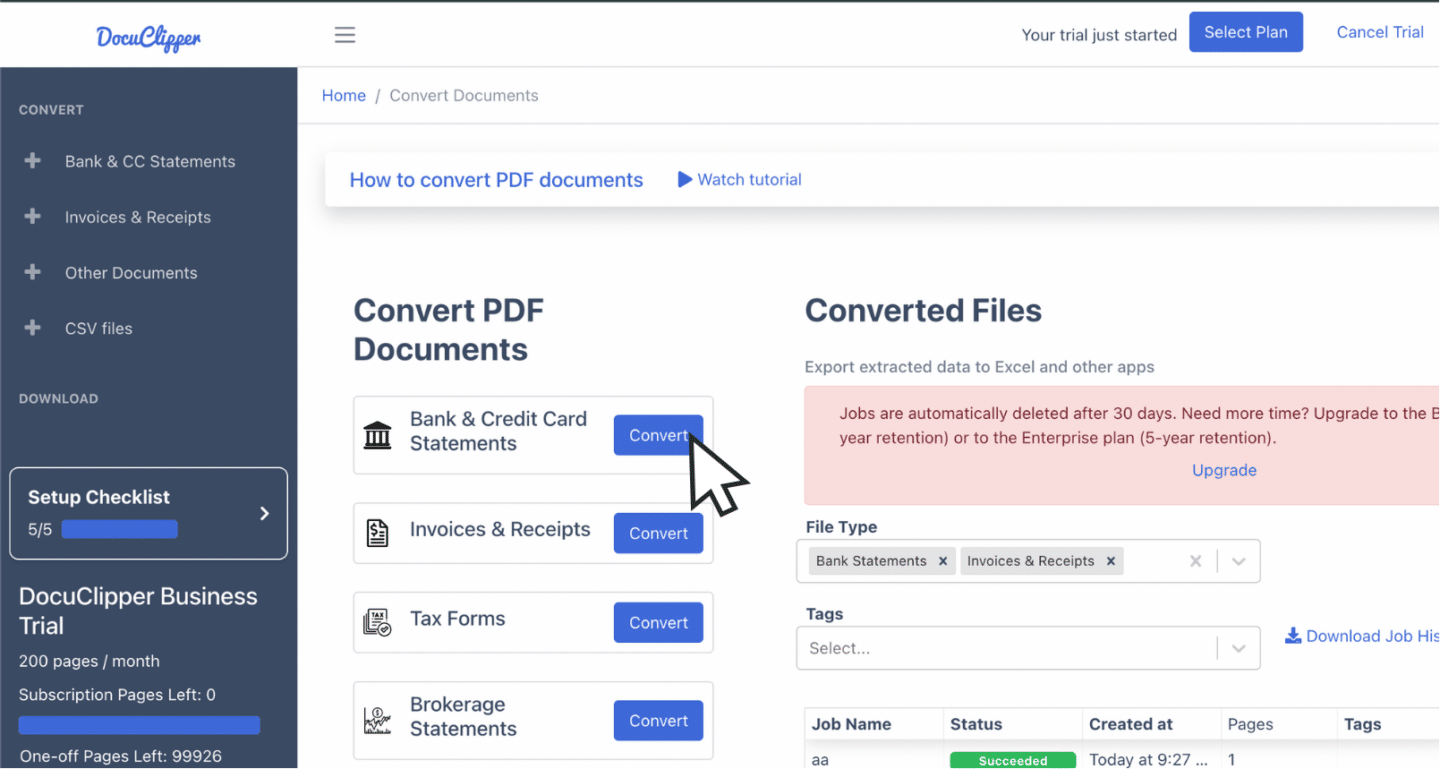
Click the bank and credit card statements section. Drag and drop as many PDF statements as you need. DocuClipper will automatically compile these into a single spreadsheet, so no worry.
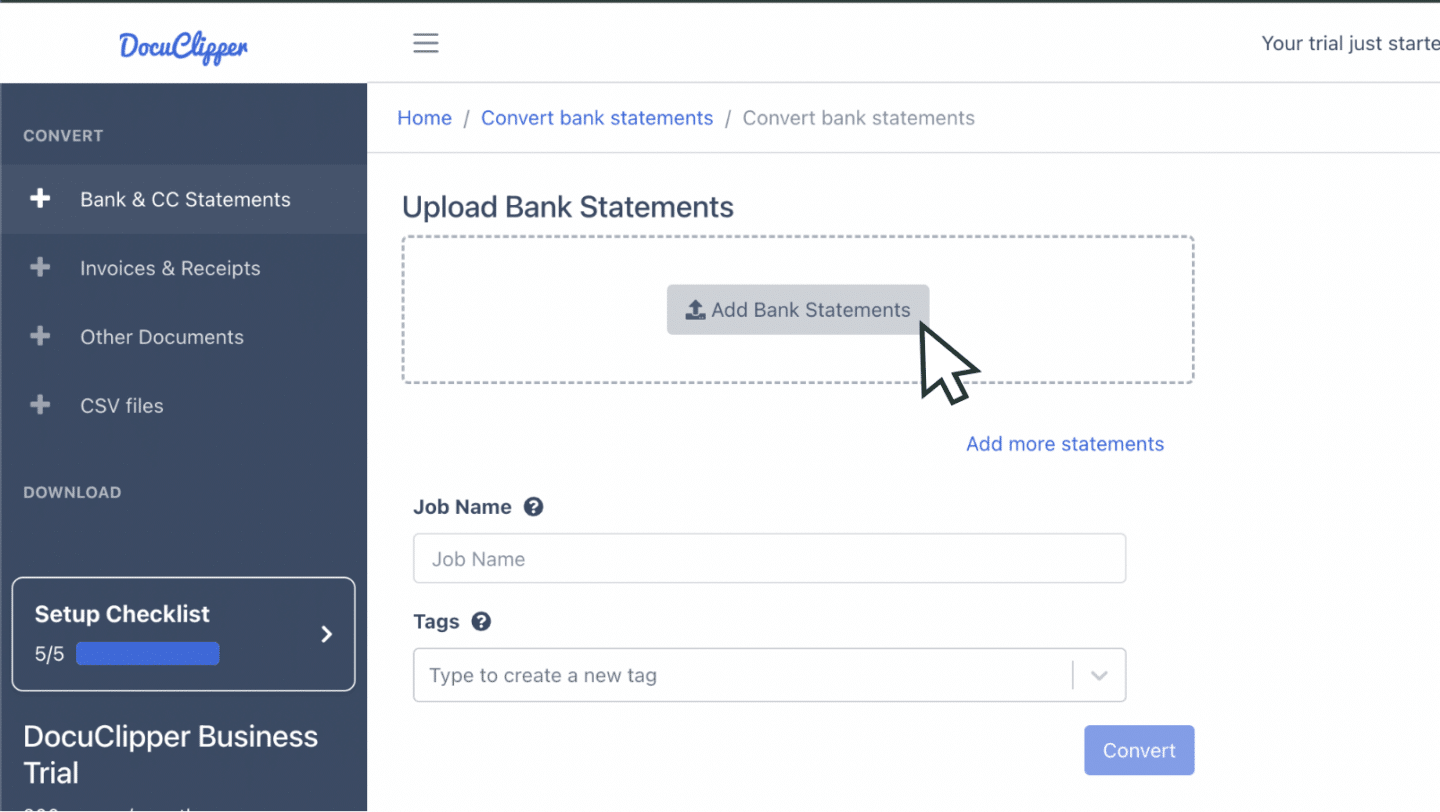
Or DocuClipper can even separate each bank statement into a separate spreadsheet, so the choice is yours.
Once you’ve uploaded your PDFs, you can assign a name or tag to the job. This makes it easier to revisit the document later if you need to make any adjustments. When everything is set, just click the “Convert” button to begin processing your files.
Step 3: Document Processing
After clicking “Convert,” DocuClipper goes to work.
It processes each detail of your statements, automatically extracting every transaction and displaying the data in a spreadsheet preview.
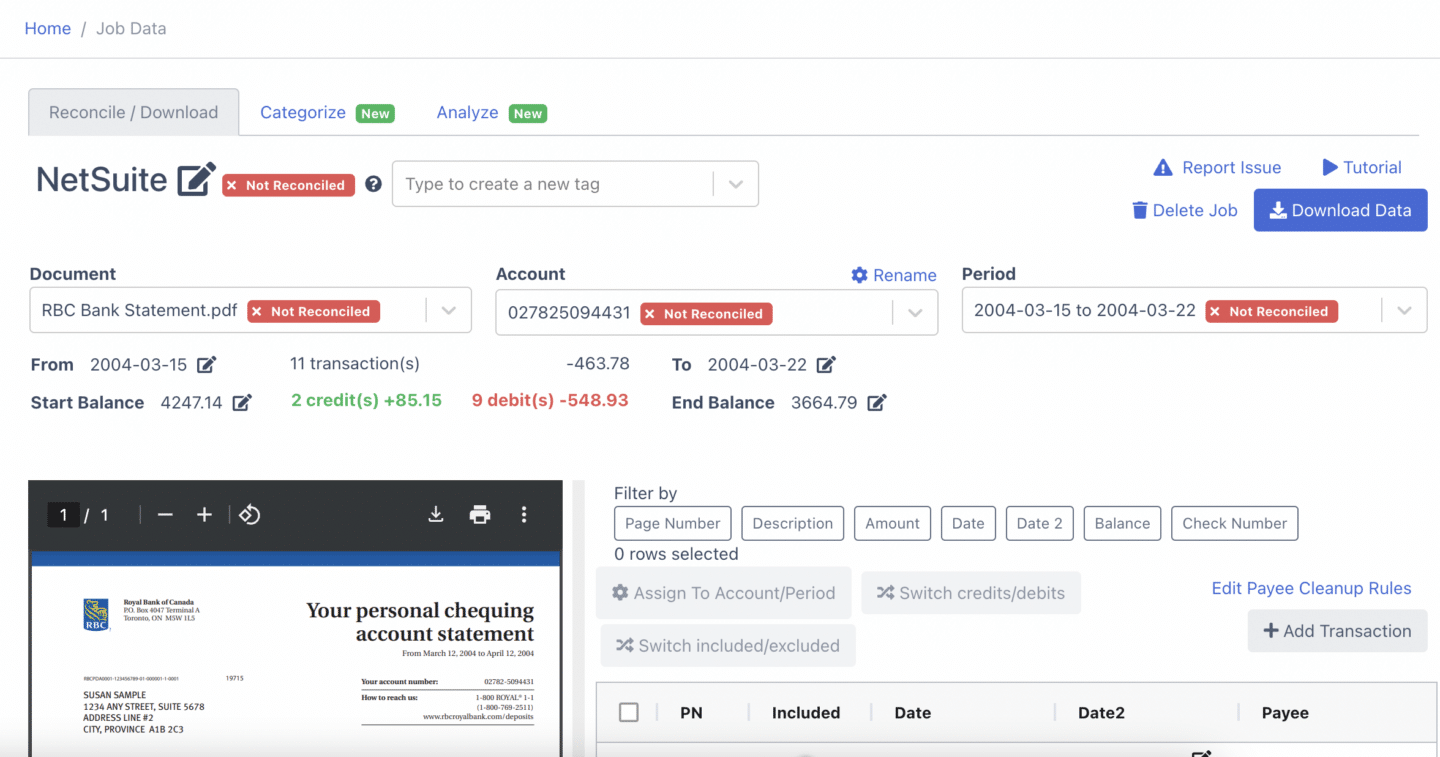
This spreadsheet isn’t finalized yet, you will also see a summary dashboard with details like starting and ending balances, transaction dates, debits, and credits.
If there is an issue with the bank statement and the conversion, it flags them as “not reconciled.”
You can then review and edit the transactions, balances, or dates to ensure everything aligns perfectly with your records.
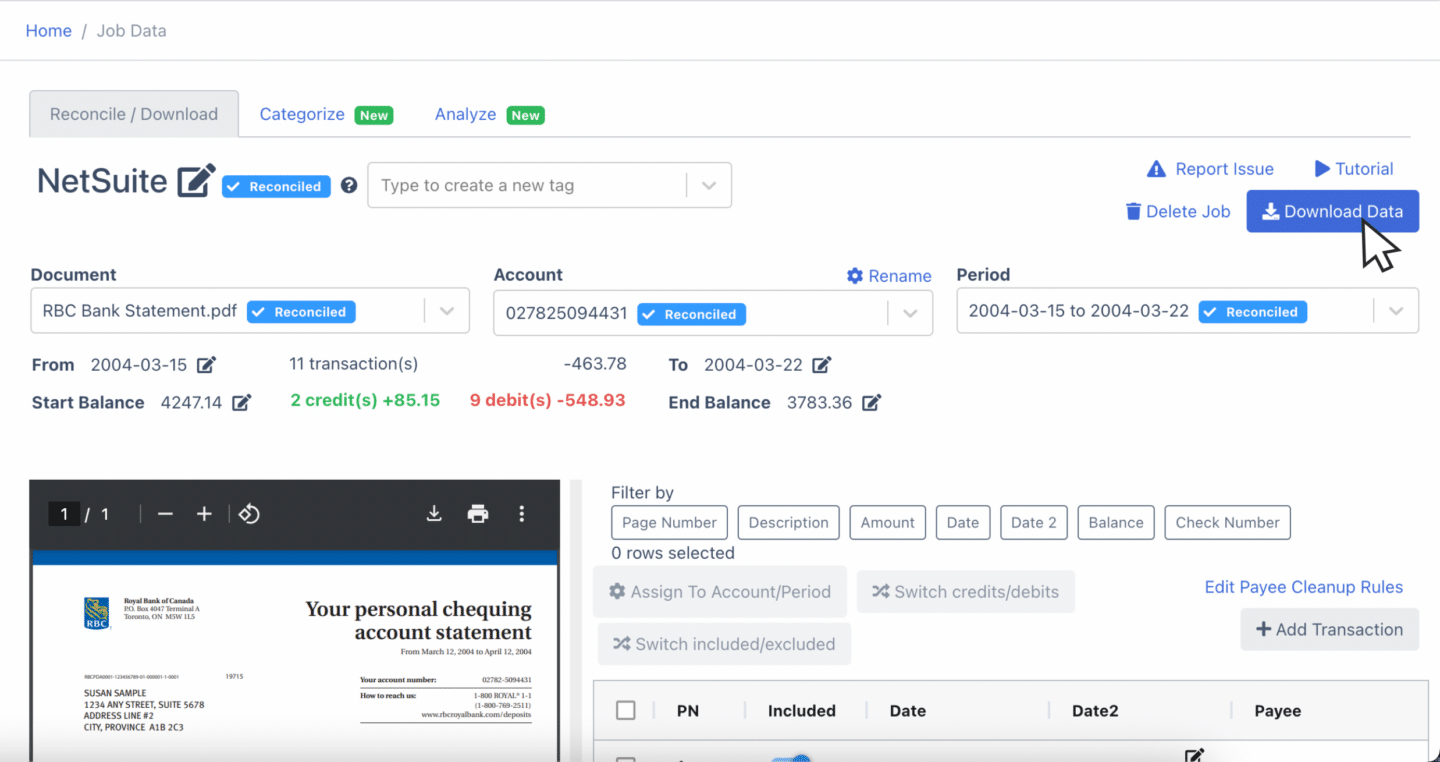
After confirming that all the data fields are accurate and complete, you’re ready to move on. Simply click “Download Data” to export your file and prepare it for import into NetSuite.
Step 4: Export Into NetSuite CSV File
Once you’ve reviewed your data and clicked “Download Data,” a configuration window will appear. Here, you can customize the output format for your spreadsheet.
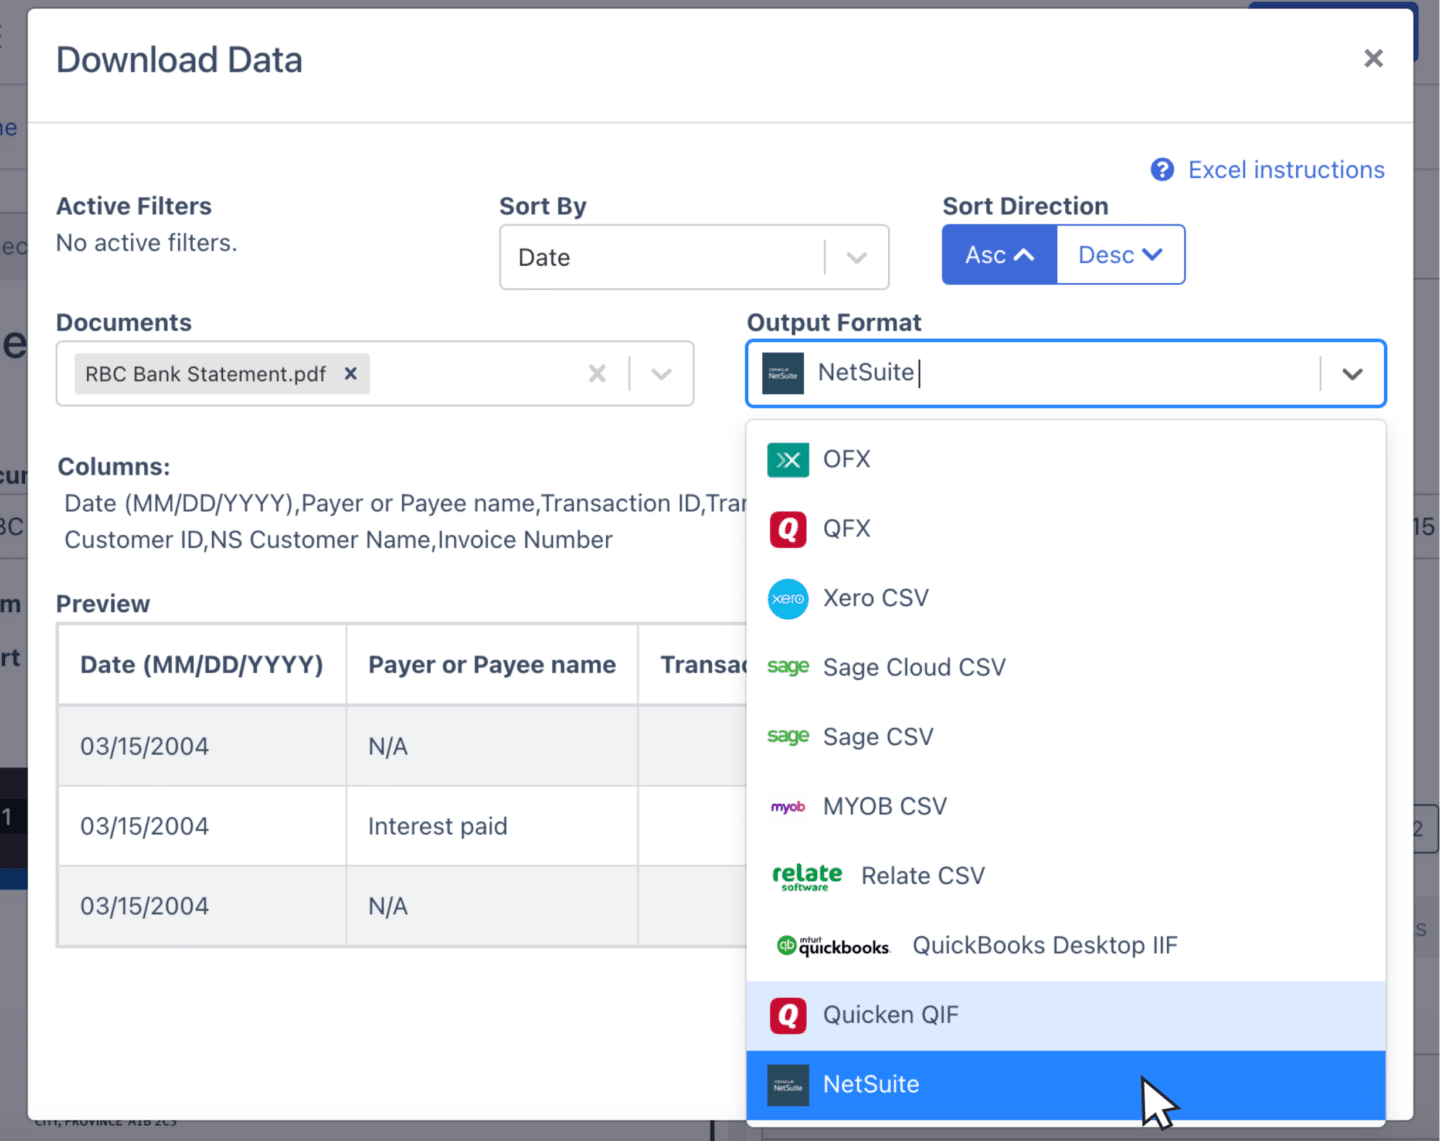
To make it NetSuite-compatible, simply select the “Export File” dropdown menu and choose the NetSuite option.
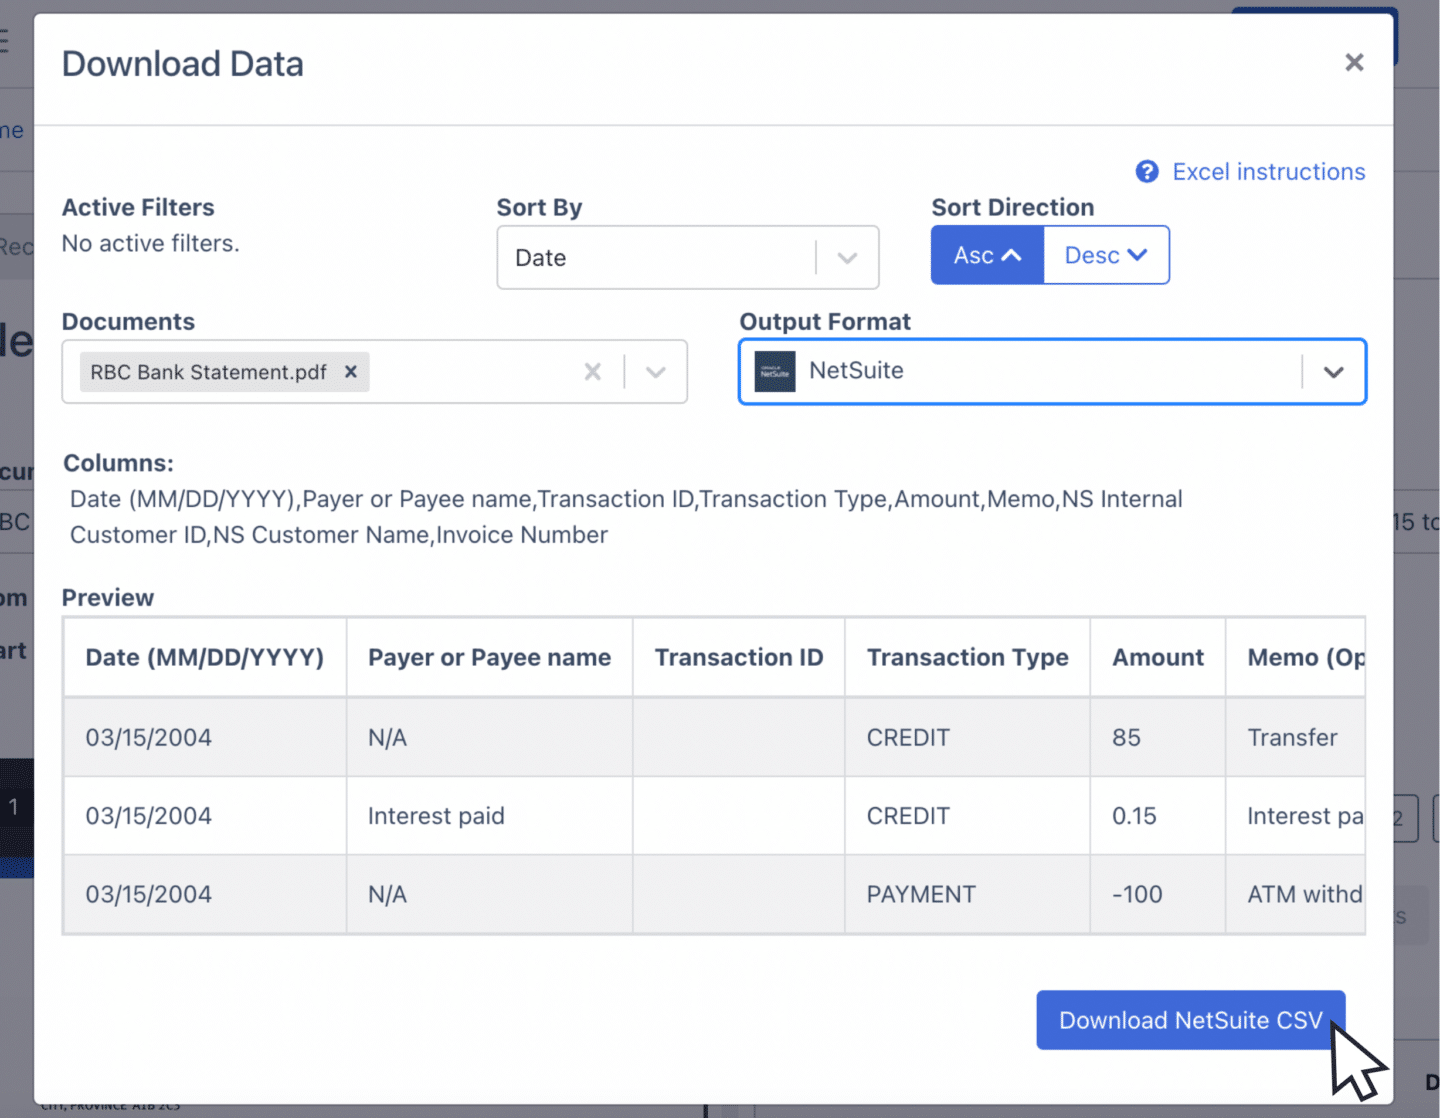
This preset is specifically designed to meet NetSuite’s formatting requirements, so there’s no need to worry about making additional edits.
Once selected, your file will be perfectly formatted and ready for the next step.
Step 5: Import NetSuite CSV File Into NetSuite
Importing your formatted CSV file into NetSuite is straightforward.
Here’s how to do it in four steps:
- Log in to NetSuite: Start by logging into your NetSuite account and navigating to the Import CSV Records page, found under Setup > Import/Export > Import CSV Records.
- Upload Your CSV File: Select the file you downloaded from DocuClipper by clicking “Choose File” and upload it. Ensure you choose the correct record type (e.g., Bank Transactions) that matches the data in your CSV.
- Match Your Fields: Use the NetSuite interface to map the fields in your CSV file to the corresponding fields in NetSuite.
- Review and Import: After confirming your mappings, review the summary screen for any errors or warnings. If everything looks correct, click Next and then Run Import to complete the process.
What is PDF Converter for NetSuite?
A PDF converter for NetSuite is a specialized tool designed to transform PDF documents such as bank statements, invoices, and receipts into CSV files suitable for NetSuite.
These tools use technologies like AI, OCR, or manual parsing to extract data from static PDFs and organize it into formats like XLS, CSV, or QBO.
PDF converters can handle hundreds of documents in seconds, eliminating the need for manual data entry and reducing the workload for your accounting or accounts payable (AP) team through automated data entry.
Why Use PDF Converter for Netsuite?
A PDF converter for NetSuite enhances your accounting workflow by improving data entry and reducing errors. Here’s how:
- Speed: OCR-based tools process PDFs in seconds, far outpacing the time-consuming task of manually typing data.
- Compatibility: NetSuite requires specific formatting for imports, and a PDF converter ensures your files meet these requirements without manual adjustments.
- Accuracy: Advanced OCR technology has accuracy rates of up to 99.6%, minimizing errors compared to manual data entry.
- Scalability: These tools can process hundreds of PDF documents in minutes, making them indispensable for managing large volumes of financial data.
Process Financial Documents Faster with DocuClipper
DocuClipper is a highly accurate PDF converter for NetSuite. It uses advanced OCR technology to extract essential accounting data from various financial documents, including bank statements, invoices, receipts, checks, brokerage statements, and tax forms.
It can process hundreds of documents in under a minute, organizing all information into a structured spreadsheet. Supporting multiple output formats such as XLSX, CSV, and QBO,
FAQs about How to Import Bank Statement into Netsuite
Here are some frequently asked questions about how to import bank statements to Netsuite:
Does NetSuite have bank feeds?
Yes, NetSuite offers the Bank Feeds SuiteApp, which automates importing bank data directly into NetSuite. It connects securely to financial institutions, providing daily updates of cleared transactions. For unsupported banks, alternatives like the Auto Bank Statement Import SuiteApp allow file uploads for seamless reconciliation and accurate financial management.
How do I import bank transactions into NetSuite?
You can import bank transactions into NetSuite using the Bank Feeds SuiteApp for automated daily imports or by manually uploading statement files in supported formats like CSV or OFX. Alternatively, use the Auto Bank Statement Import SuiteApp for secure file transfers, ensuring seamless reconciliation and accurate financial records. (Learn how to convert PDF to OFX and QFX)
What file formats can I import into NetSuite for bank statements?
NetSuite supports various file formats for bank statement imports, including CSV, OFX, QFX, BAI2, and CAMT.053. These formats ensure compatibility with the system, allowing smooth imports for bank statement reconciliation. If your bank’s format isn’t supported, tools like the Auto Bank Statement Import SuiteApp can help convert files into compatible formats.
Which banks are compatible with NetSuite’s import features?
NetSuite’s Bank Feeds SuiteApp supports financial institutions in the U.S., Canada, Europe, New Zealand, Hong Kong, Indonesia, Malaysia, Philippines, Singapore, and Thailand. For a detailed list of supported banks, refer to SuiteAnswers ID 90911. If your bank isn’t supported, consider using the Auto Bank Statement Import SuiteApp or a custom connectivity plug-in.
How often should I import bank statements into NetSuite?
You should import bank statements into NetSuite as often as needed to keep your financial records up-to-date. For daily reconciliation, automated imports via the Bank Feeds SuiteApp ensure transactions are current. Alternatively, manual imports can be done weekly or monthly, depending on your business’s accounting and reporting requirements.
How do I automate bank statement imports in NetSuite?
To automate bank statement imports in NetSuite, install the Auto Bank Statement Import (ABSI) SuiteApp. This tool establishes a secure SFTP connection with your financial institution, enabling daily automatic imports of bank statement files into NetSuite. Configure the SFTP connection within the format profile to initiate the automated process.
What is the cost of using PDF Converter for NetSuite?
DocuClipper is a PDF financial document converter compatible with NetSuite that offers several pricing plans to accommodate different user needs:
- Starter Plan: $39 per month, ideal for freelancers and small businesses with moderate processing requirements.
- Professional Plan: $74 per month, suitable for businesses with larger volumes.
- Business Plan: $159 per month, designed for extensive processing needs.
