Manually entering invoices into Dynamics 365 Business Central works when you only have a few, but as the number grows, it becomes overwhelming. Typing invoice details one by one isn’t just time-consuming, it also increases the risk of errors that can throw off your financial records.
You can streamline the process by automating invoice imports instead of manually inputting data. Dynamics 365 Business Central allows bulk uploads, but your data needs to be formatted correctly to avoid import errors and validation issues.
In this guide, you’ll learn how to import invoices into Dynamics 365 Business Central efficiently, including how to convert PDF invoices into a CSV file that meets the system’s requirements. This eliminates manual entry, reduces errors, and saves you hours of work.
Step 0: Digitalize Invoices (For Paper Invoices)
If you have paper documents, the first step is to scan the invoices into a digital format. A high-resolution PDF ensures better data extraction accuracy and reduces processing errors.
To get the best results, keep the document clean, remove unnecessary marks, and align it properly to avoid skewed text. Using a high-resolution scan enhances text recognition, making it easier to extract data when converting PDFs to CSV files for Dynamics 365 Business Central.
Step 1: Capture Invoice Data
Once your invoices are in digital format, the next step is to extract their data for import into Dynamics 365 Business Central.
Automatic Invoice Data Capture with DocuClipper
DocuClipper simplifies invoice data extraction by automatically extracting data, like vendor name, invoice number, invoice date, line items, amounts, tax, and quantities. Instead of manually typing or copying the invoice information, all data is processed digitally.
How to use DocuClipper:
- Open DocuClipper in your web browser and go to the invoice OCR section.
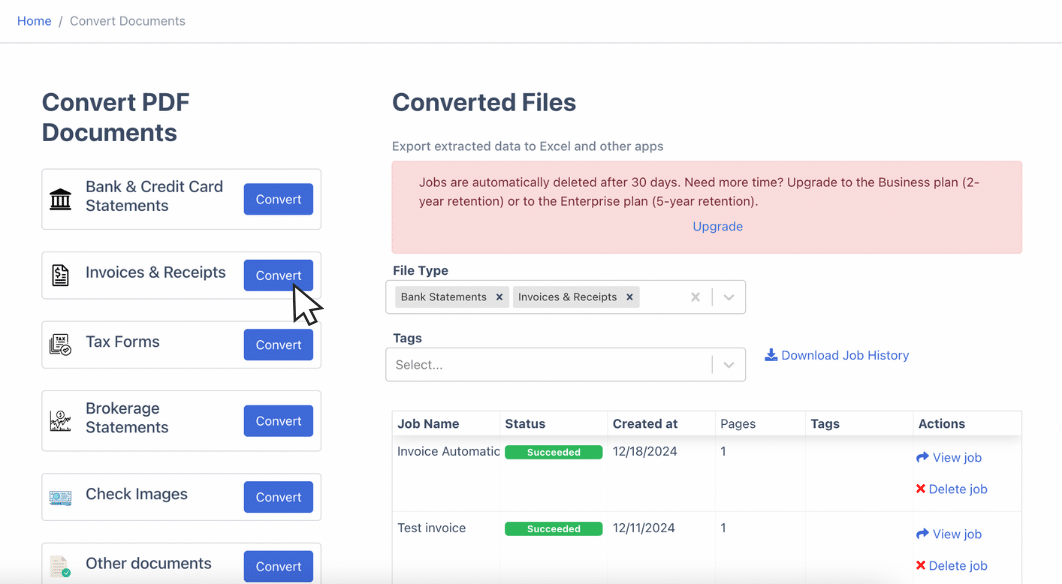
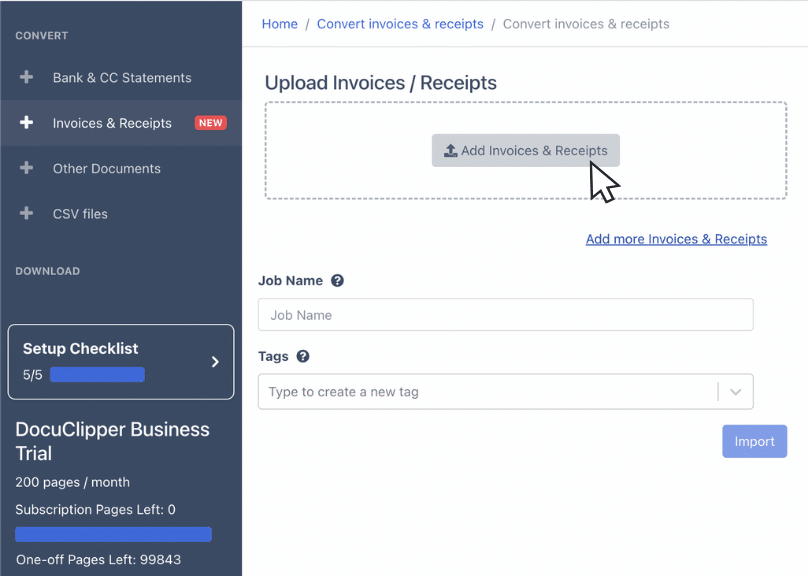
- Drag and drop one or multiple invoices.
- DocuClipper extracts the invoice data automatically, no need to manually parse the sections of the invoices, this applies to all invoice formats.
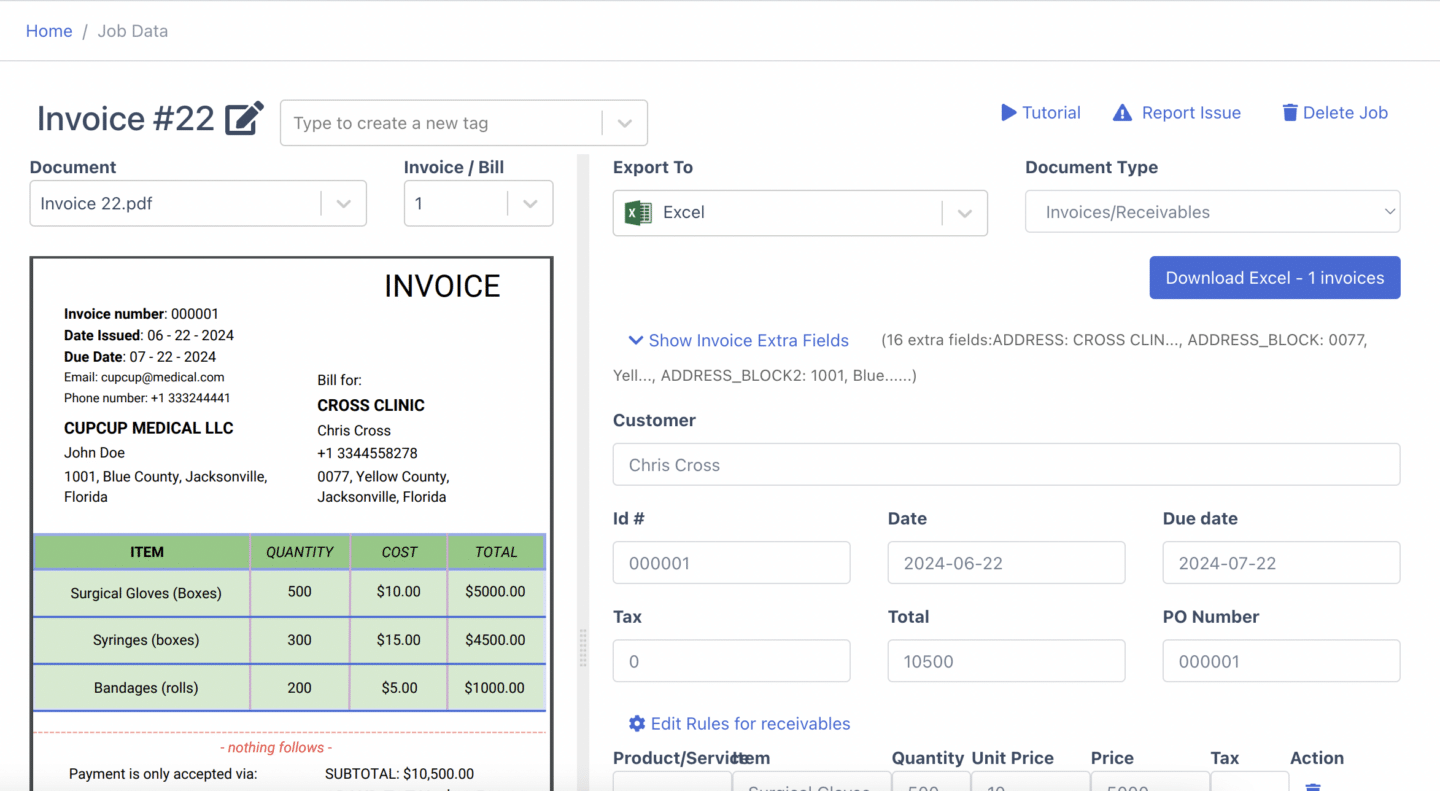
- Review the extracted line item information and adjust fields if needed, including marking transactions as invoices, bills, accounts payable, or accounts receivable.
Once processed, DocuClipper generates a Dynamics 365 Business Central-compatible CSV file that meets all formatting requirements.
The Manual Alternative (Not Recommended)
If you choose to enter invoice data manually, you’ll need to create a spreadsheet, input vendor details, invoice numbers, amounts, and taxes, and then adjust the format to meet Dynamics 365 Business Central’s requirements before saving it as a CSV.
This approach is slow, error-prone, and inefficient. Even with verification, manual entry has a 4% error rate, increasing the risk of incorrect financial records. Processing just one invoice can take up to 30 minutes, making it impractical for businesses dealing with large volumes of invoices.
By automating invoice data capture with DocuClipper, you can significantly reduce errors, save time, and ensure that all invoices are properly formatted for import into Dynamics 365 Business Central.
Step 2: Export the Invoice Data Into Dynamics 365 Business Central Compatible CSV File
Once the invoice data has been extracted and reviewed, the next step is to export it in a format that Dynamics 365 Business Central can recognize.
With DocuClipper invoices capture, this is straightforward. After uploading and verifying invoice data, go to the export section and select CSV as the export format.
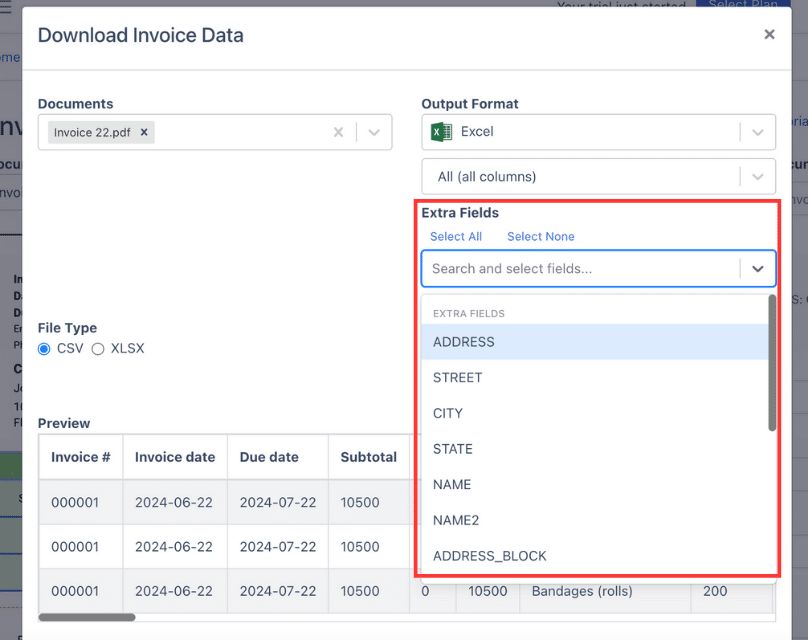
If needed, adjust the column layout to match the required format for Dynamics 365 Business Central. When everything is correctly structured, download the finalized CSV file.
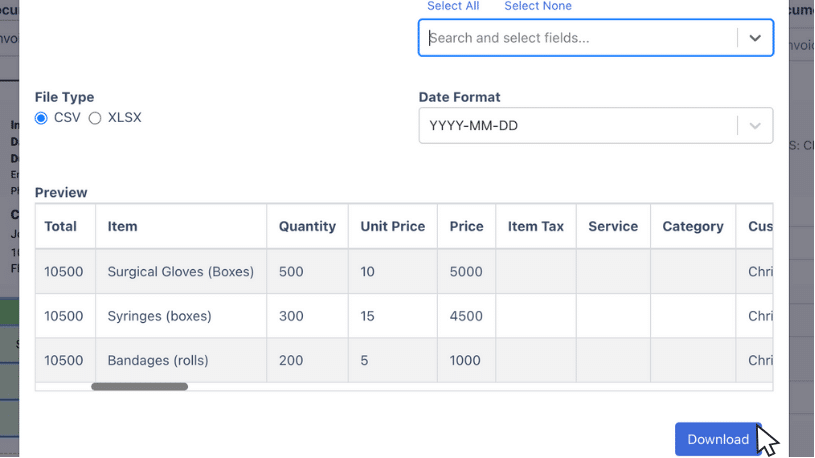
Since Dynamics 365 Business Central has specific formatting requirements for imports, it’s important to review the spreadsheet before proceeding. Check that all necessary fields are correctly labeled and formatted to avoid errors during import.
Step 3: Import Invoice Data Into Dynamics 365 Business Central
After exporting the invoice data into a Dynamics 365 Business Central-compatible CSV file using DocuClipper, the next step is to import it into the system. The import process allows bulk uploads of purchase invoices or credit memos from an Excel or CSV file, eliminating manual data entry.
1. Open the Purchase Invoice Import Tool
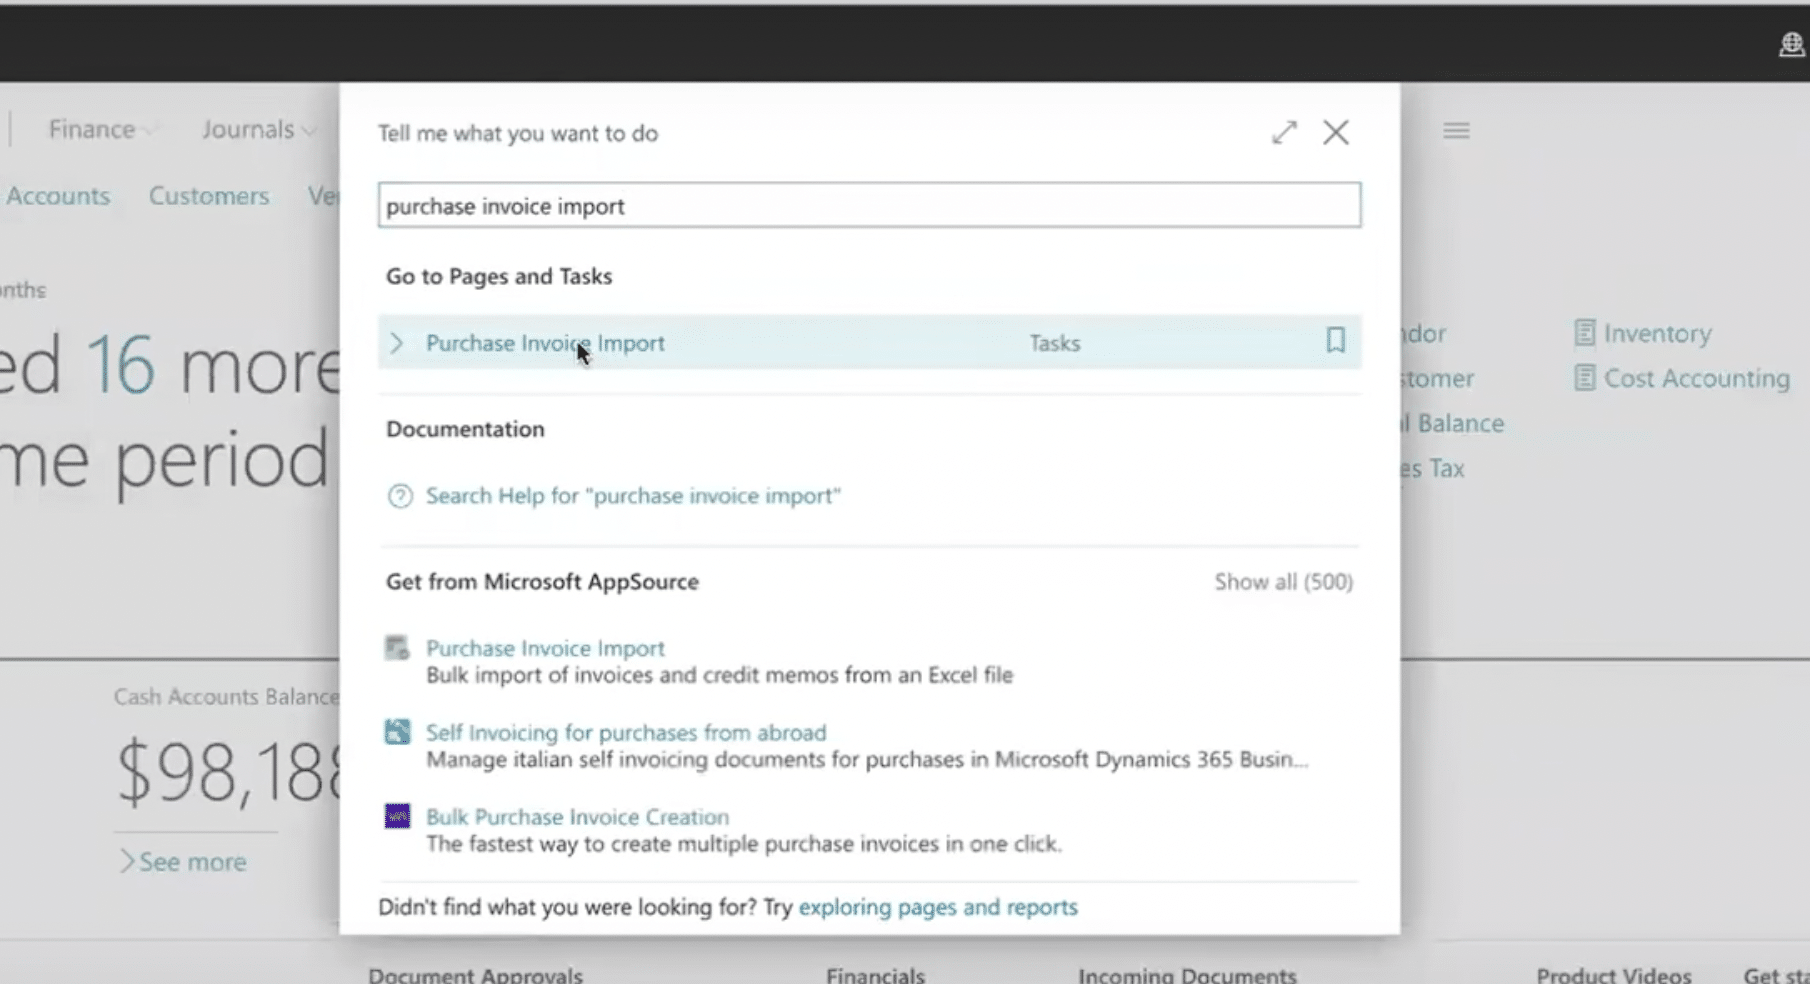
Use the search function in Dynamics 365 Business Central and type Purchase Invoice Import. Click on the tool to open the import interface.
2. Upload the CSV File
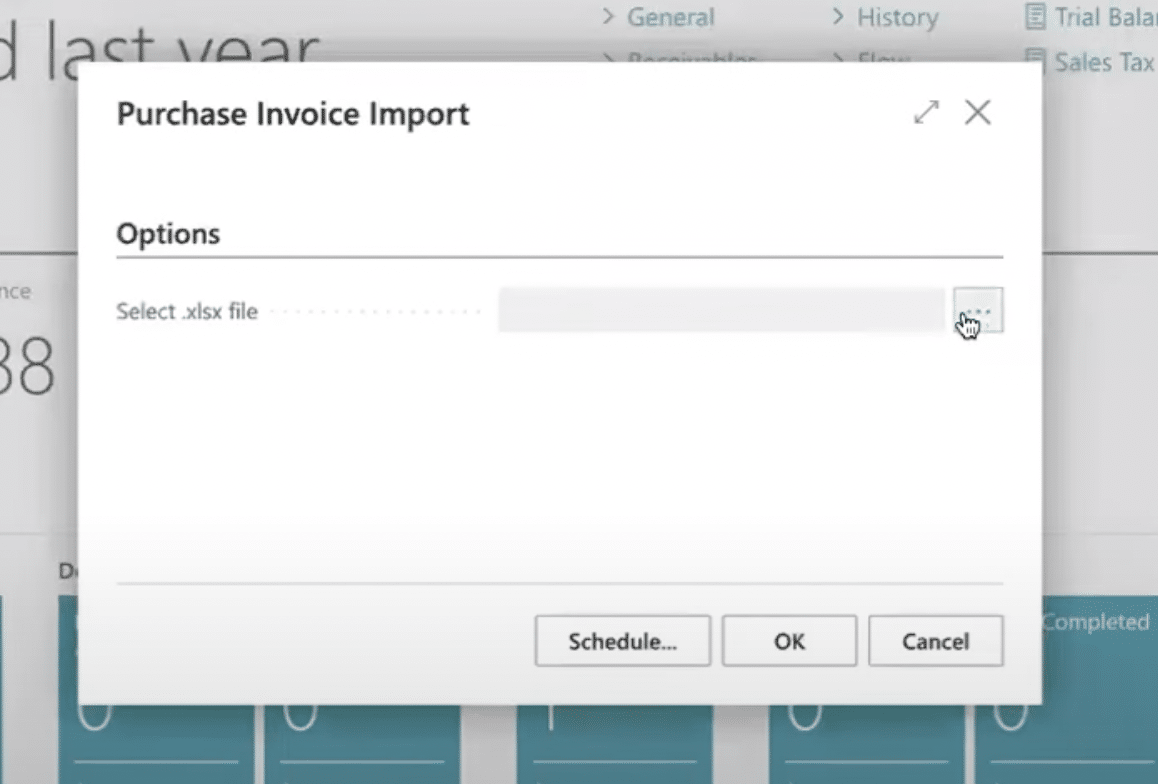
Click the Ellipsis (…) button and select Choose File to upload your CSV. Locate the file exported from DocuClipper and confirm the selection.
3. Configure Import Options
Before proceeding, review the import settings. Choose whether you are importing new invoices or updating existing ones. If necessary, select additional options based on your accounting setup.
4. Start the Import Process
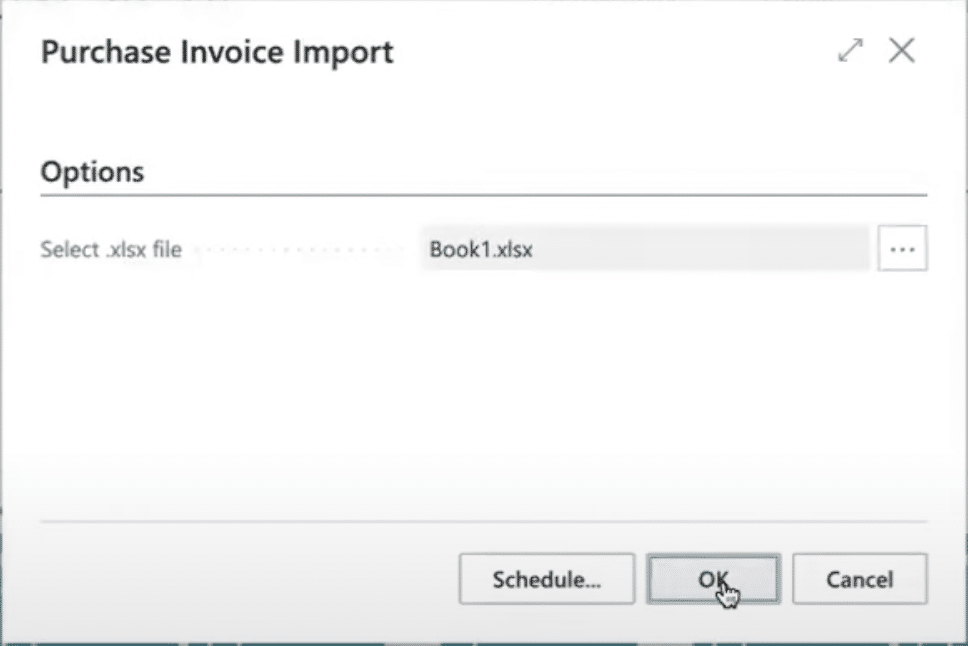
Click OK to begin the import. Dynamics 365 Business Central will process each invoice in the CSV file, mapping the data to the correct fields automatically.
5. Monitor the Import Progress
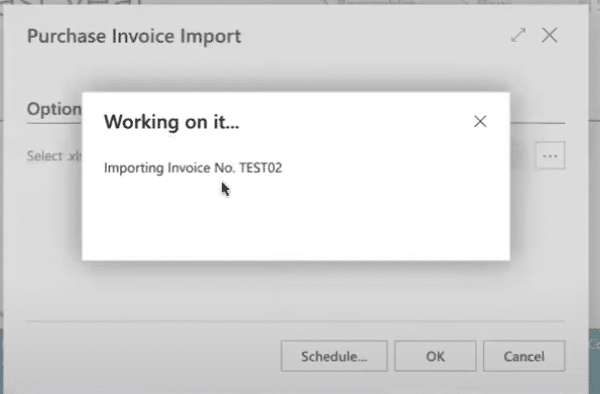
A progress bar will indicate the status of the import. If the file contains any errors, you will receive a notification with details on what needs to be corrected. If all records are valid, the system will complete the import without issues.
6. Verify the Imported Invoices
Once the import is successful, navigate to Purchases > Purchase Invoices to review the newly created invoices. Open individual records to confirm that the vendor names, invoice numbers, amounts, and line items have been imported correctly.
7. Review Credit Memos If Needed
If the import includes purchase credit memos, go to Purchases > Purchase Credit Memos to verify the imported records. Make sure all values are correct and that credit amounts are applied properly.
- How to Import invoices into QuickBooks Online
- How to Import Invoices into Zoho Books
- How to Import Invoices into SAP Business One
- How to Import Invoices into Xero
- How to Import Invoices into Sage
- How to Import Invoices into FreshBooks
- How to Import Invoices into NetSuite
How DocuClipper Automates Importing Invoices Into Dynamics 365 Business Central
Manually entering invoice data into Dynamics 365 Business Central can be slow, error-prone, and overwhelming, especially when dealing with a large number of invoices.
Instead of spending hours inputting details manually, DocuClipper automates the process by extracting invoice data and converting it into a CSV file compatible with Dynamics 365 Business Central in seconds.
With DocuClipper, you can process multiple invoices at once. The system accurately captures essential details like invoice numbers, dates, vendors, line items, and totals.
The exported CSV file is fully customizable, allowing you to match Dynamics 365 Business Central’s formatting requirements without the need for manual adjustments.
For those who prefer working with spreadsheets, DocuClipper also converts PDF invoices into Excel. Its high OCR accuracy minimizes errors, eliminating typos and ensuring that invoices are imported correctly the first time.
FAQs about Importing Invoices into Dynamics 365 Business Central
Here are some frequently asked questions about Importing Invoices into Dynamics 365 Business Central:
How do I bulk import invoices into Dynamics 365 Business Central?
To bulk import invoices into Dynamics 365 Business Central, go to the Purchase Invoice Import tool, upload your CSV file, and start the import process. The system will automatically map and validate the data. Once imported, review the invoices under Purchases > Purchase Invoices to ensure accuracy.
Can I import a CSV file into Dynamics 365 Business Central?
Yes, you can import a CSV file into Dynamics 365 Business Central. Use the Purchase Invoice Import tool to upload your CSV, ensuring it is properly formatted. The system will process the data, map fields automatically, and validate entries before completing the import. Review the imported invoices under Purchases > Purchase Invoices to confirm accuracy.
Can I import transactions into Dynamics 365 Business Central?
Yes, you can import transactions into Dynamics 365 Business Central. Use the Import Data functionality or a configuration package to upload a properly formatted CSV file. The system will process the data, validate entries, and apply the transactions accordingly. After import, review the records in the respective transaction module to ensure accuracy.
Can you import old data into Dynamics 365 Business Central?
Yes, you can import old data into Dynamics 365 Business Central. Use the Import Data tool or a configuration package to upload historical invoices, transactions, or financial records in a properly formatted CSV file. Ensure that the data aligns with Business Central’s structure to prevent validation errors. After import, review the records to confirm accuracy.
Can you import a bill into Dynamics 365 Business Central?
Yes, you can import a bill into Dynamics 365 Business Central using the Purchase Invoice Import tool. Upload a properly formatted CSV file containing bill details such as vendor name, invoice number, amounts, and due dates. The system will validate and process the data, allowing you to review the imported bills under Purchases > Purchase Invoices for accuracy.
Can I import Excel into Dynamics 365 Business Central?
Yes, you can import Excel into Dynamics 365 Business Central. Convert the Excel file to a CSV format and use the Purchase Invoice Import tool or a configuration package to upload it. Ensure the data follows Business Central’s formatting requirements to prevent errors. After import, review the records to confirm accuracy.
