Manually entering invoices into FreshBooks may work when handling a small number of invoices, but as the volume grows, it becomes a tedious and error-prone process. Typing invoice details one by one takes up valuable time and increases the risk of mistakes that could affect your financial records.
Instead of manually entering data, you can streamline the process by automating invoice imports. FreshBooks allows bulk uploads, but the data must be properly formatted to prevent errors and ensure a smooth import.
This guide will walk you through how to import invoices into FreshBooks efficiently, including how to convert PDF invoices into a CSV file that aligns with FreshBooks’ formatting requirements.
Step 0: Digitalize Invoices (For Paper Invoices)
If your invoices are in paper form, the first step is to scan the invoice into a digital file. A high-resolution PDF improves data extraction accuracy and minimizes processing errors.
For the best results, ensure the document is clean, free from unnecessary marks, and properly aligned to prevent distorted text. Scanning at a high resolution enhances text recognition, making it easier to extract invoice data when converting PDFs to CSV files for FreshBooks.
Step 1: Capture Invoice Data
DocuClipper eliminates the need for manual data entry by automating invoice data extraction. Instead of manually entering details line by line, you can quickly capture key information such as vendor name, invoice number, invoice date, line items, amounts, tax, and quantities.
Automatic Invoice Data Capture with DocuClipper
DocuClipper streamlines invoice data extraction by automatically identifying and processing invoice details. This includes vendor names, invoice numbers, dates, line items, amounts, and taxes. Instead of copying and pasting data, everything is extracted digitally for improved efficiency and accuracy.
How to use DocuClipper:
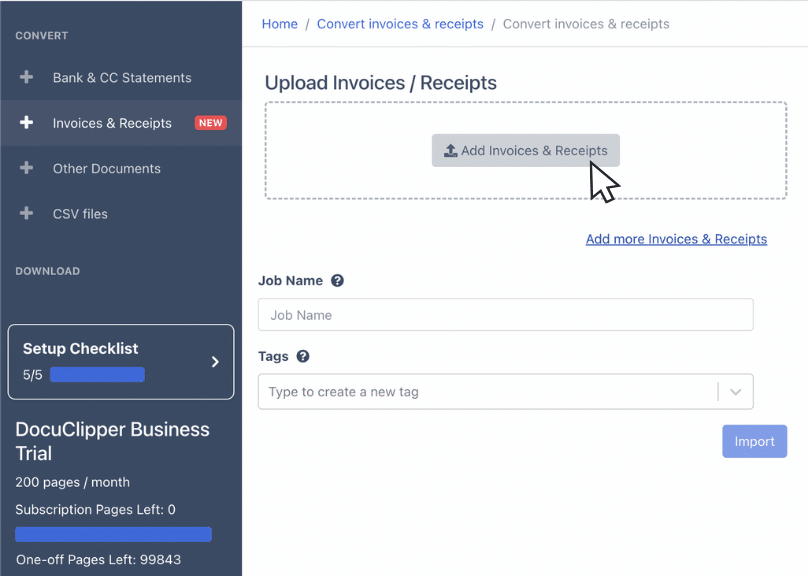
- Open DocuClipper in your web browser and go to the invoice OCR section.
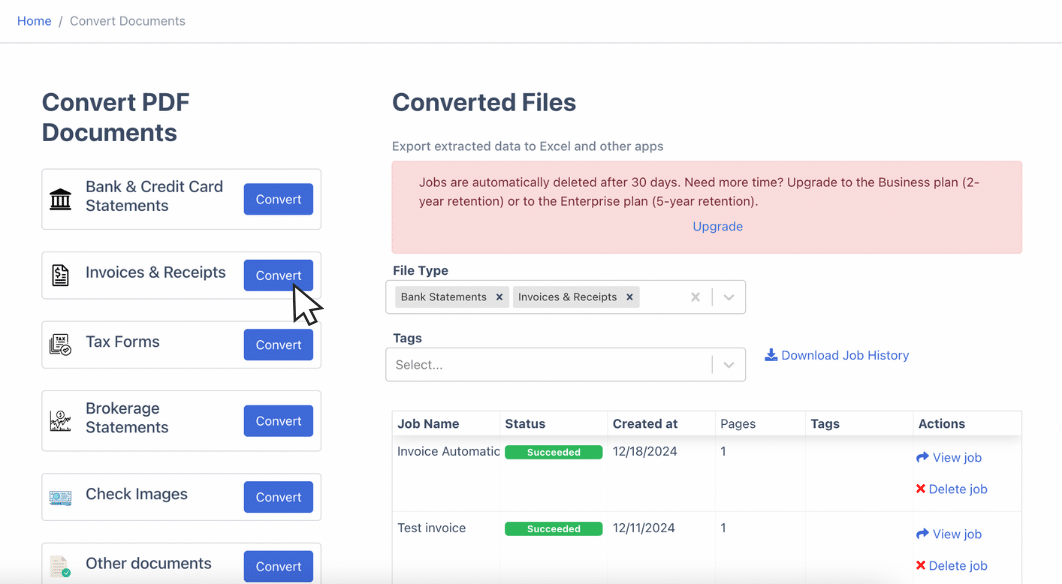
- Drag and drop one or multiple invoices.
- DocuClipper extracts the invoice data automatically, no need to manually parse the sections of the invoices, this applies to all invoice formats.
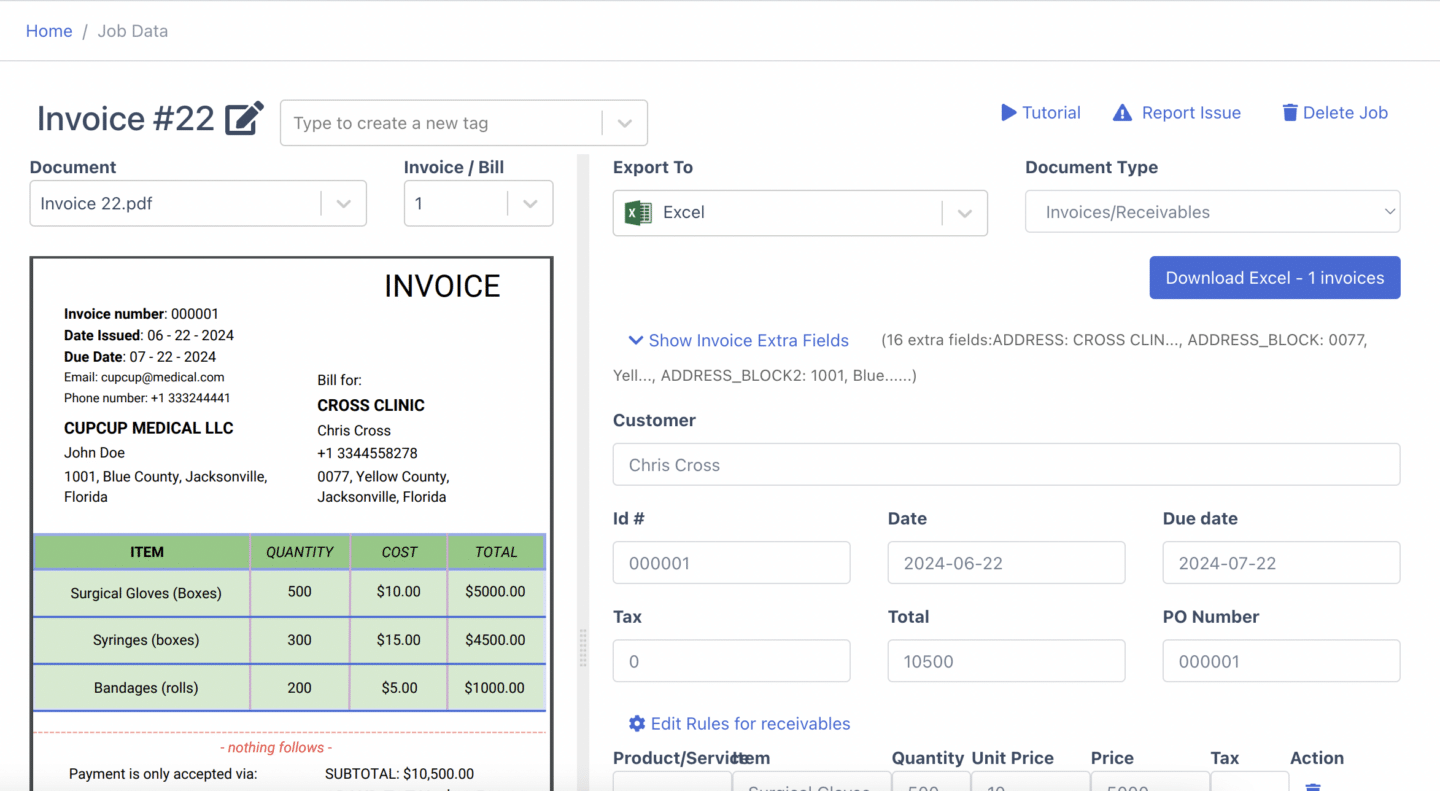
- Review the extracted line item information and adjust fields if needed, including marking transactions as invoices, bills, accounts payable, or accounts receivable.
Once completed, DocuClipper generates a FreshBooks-compatible CSV file with the correct formatting for easy import.
The Manual Alternative (Not Recommended)
If you choose to enter invoice data manually, you’ll need to create a spreadsheet, input vendor details, invoice numbers, amounts, and tax information, and format it according to FreshBooks’ import requirements before saving it as a CSV file.
This method is inefficient, prone to mistakes, and highly time-consuming. Even with careful verification, manual data entry has an estimated 4% error rate, increasing the likelihood of financial discrepancies. Processing a single invoice manually can take up to 30 minutes, making it an impractical option for businesses handling large invoice volumes.
By automating invoice data capture with DocuClipper, you can save time, reduce errors, and ensure your invoices are formatted correctly for seamless import into FreshBooks.
Step 2: Export the Invoice Data Into Zoho Books Compatible CSV File
DocuClipper makes it easy to export invoice data into a format that FreshBooks can recognize. Once the invoice details have been captured and reviewed, the next step is to generate a correctly formatted CSV file for import.
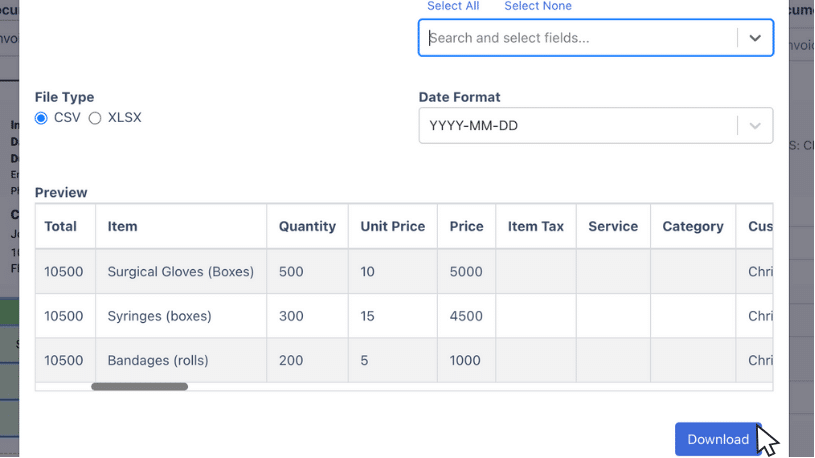
After verifying the invoice data in DocuClipper, go to the export section and select CSV as the output format.
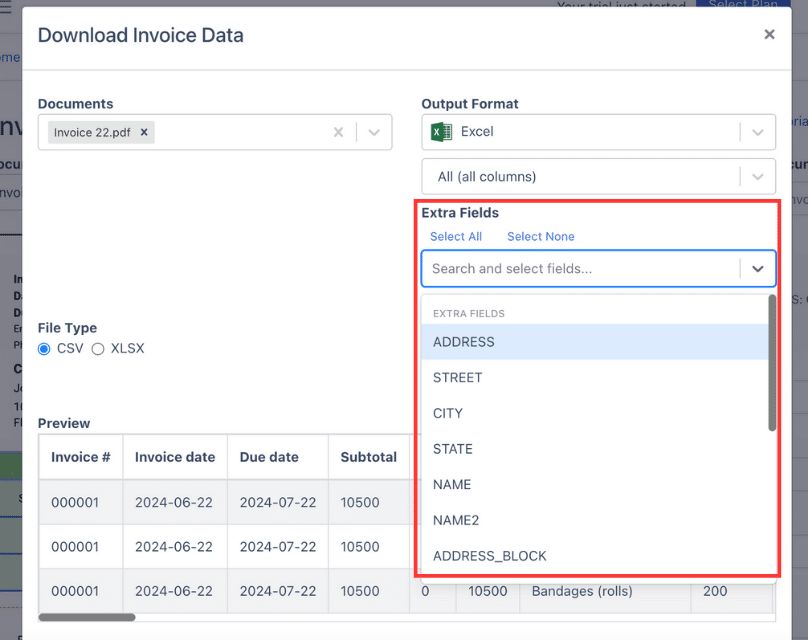
If needed, adjust the column structure to match FreshBooks’ formatting requirements. When everything is properly organized, download the finalized CSV file.
Since FreshBooks has specific import guidelines, it’s important to review the spreadsheet before uploading it. Check that all required fields are correctly labeled and formatted to avoid errors during the import process.
Step 3: Import Invoice Data Into FreshBooks
Once your CSV file is ready, the next step is to import it into FreshBooks. The platform supports bulk imports, making it easier to process multiple invoices at once without manual entry.
- Access the Import Tool: Log in to FreshBooks and navigate to Expenses. Click on More Actions and select Import Expenses from a File from the dropdown menu.
- Select and Upload the CSV File: Click Choose File and select the CSV file exported from DocuClipper. Ensure that the file is in CSV format; if it’s in Excel, convert it before proceeding.

- Adjust Import Settings:
- Verify that your file contains the necessary headers, such as Amount, Category, Date, Description, and Merchant.
- Choose whether FreshBooks should generate invoice numbers automatically or use the ones in your file.
- If invoices contain multiple line items, ensure each line uses the same invoice number, date, and client name for proper grouping.
- Set the correct Character Encoding and Delimiter (Comma is recommended).
- Map CSV Fields to FreshBooks Fields
FreshBooks will attempt to match the columns in your file with its required fields. Review the mappings and make adjustments if necessary.

- Required fields include Amount, Category, and Date.
- If you frequently import invoices in the same format, save the mapping settings for future use.
- Start the Import Process: Click Import Expenses to begin. FreshBooks will scan the file and flag any errors. If issues arise, you’ll have the opportunity to correct them before finalizing the import.
- Confirm Imported Invoices: After the import is complete, go to Expenses to verify the newly added invoices. Open a few records to confirm that amounts, categories, and descriptions are correctly imported.
If you are using a different software, here are some tutorials to import your invoices:
- How to Import invoices into QuickBooks Online
- How to Import Invoices into Zoho Books
- How to Import Invoices into Dynamics 365 Business Central
- How to Import Invoices into Xero
- How to Import Invoices into Sage
- How to Import Invoices into SAP Business One
- How to Import Invoices into NetSuite
How DocuClipper Automates Importing Invoices Into Fresh Books
Manually entering invoice data into FreshBooks is time-consuming, prone to errors, and inefficient, especially when handling a high volume of invoices.
Instead of spending hours on data entry, DocuClipper streamlines the process by automatically extracting invoice details and converting them into a FreshBooks-compatible CSV file in seconds.
With DocuClipper, you can process multiple invoices at once, capturing essential details such as invoice numbers, dates, vendor names, line items, and totals with precision. The generated CSV file is fully customizable to match FreshBooks’ formatting requirements, eliminating the need for manual adjustments.
For those who prefer working with spreadsheets, DocuClipper also allows you to convert PDF invoices into Excel. Its advanced OCR technology improves accuracy, reducing typos and data entry errors, and ensuring invoices are correctly imported the first time.
FAQs about How to Import Invoices to QuickBooks
Here are some frequently asked questions about importing invoices into FreshBooks:
How do I bulk import invoices into FreshBooks?
To bulk import invoices into FreshBooks, navigate to the Invoices section, click on the More Actions button, and select Import Invoices. Upload your CSV file and ensure the column headers match FreshBooks’ required fields. Review and confirm the mappings before starting the import. Once completed, check the imported invoices to ensure accuracy.
Can I import a CSV file into FreshBooks?
Yes, FreshBooks allows you to import invoices using a CSV file. Go to the Invoices section, select More Actions, and choose Import Invoices. Upload your CSV file and map the fields to FreshBooks’ format. Ensure the data is structured correctly before proceeding. Once imported, review your invoices to confirm accuracy.
Can I import transactions into FreshBooks?
Yes, you can import transactions into FreshBooks using a CSV file. Navigate to the Expenses section, click More Actions, and select Import Expenses from a File. Upload your CSV file and map the fields accordingly. Ensure the data is formatted correctly to prevent errors. Once imported, review the transactions for accuracy.
Can you import old data into FreshBooks?
Yes, you can import old data into FreshBooks using a CSV file. Navigate to Settings > Import Data, select the relevant module, and upload your file. Ensure that your data is formatted correctly to match FreshBooks’ requirements. After the import, review the records to confirm accuracy before finalizing.
Can you import a bill into FreshBooks?
No, FreshBooks does not currently support direct bill imports. However, you can manually enter bills or use third-party integrations to sync bill data. If you have expenses to import, you can upload them via a CSV file under the Expenses section. Always review imported data to ensure accuracy.
Can I import Excel into FreshBooks?
FreshBooks does not support direct Excel imports. However, you can convert your Excel file to CSV format and then upload it. To do this, save your spreadsheet as a CSV file and use the import feature for expenses or other supported data. Ensure your columns match FreshBooks’ required fields for a smooth import.