Step 1: Upload your Invoice or Receipt
- Log in to DocuClipper: Access your account by entering your credentials.
- Navigate to Data Extraction: Click on “Invoices & Receipts” located in the left sidebar at the top under “Convert” or within the dashboard main page.
- Upload Your Scanned or PDF Invoice or Receipt: Drag and drop one or more PDFs or scanned of your Invoice or Receipt.
- Import File: Once the upload is complete, click on “Import”

Step 2 – Import your Invoices and Receipts into QuickBooks Online with DocuClipper
To import your invoice and receipt to QuickBooks follow the steps below:
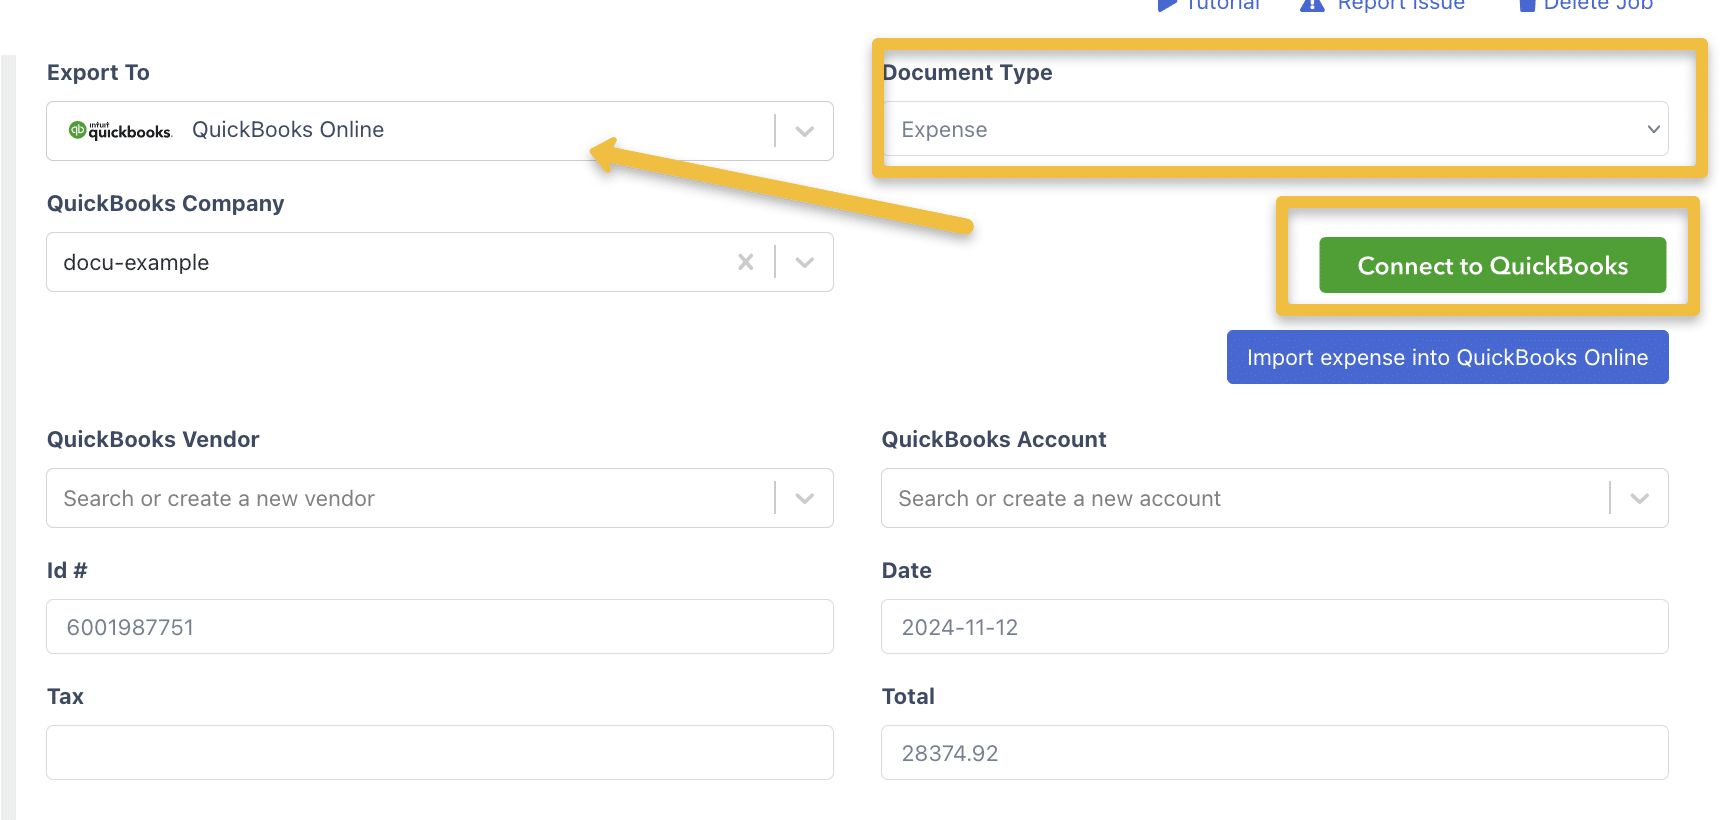
- Select Output Format: Click “Export to” and choose ”QuickBooks Online”.
- Select Document Type: Bills/Expense
- Add Your QuickBooks Company: If not connected click on “Connect to QuickBooks“. This will route you to log in to your Intuit account.
- Connect DocuClipper with QBO: Once you are logged in. It will ask you to connect DocuClipper with QBO, click on “Connect“.

- Successful Integration: Once you click on connect this will route you back to DocuClipper. Click on “Export to” and select QuickBooks Online. Your company will then show on the “QuickBooks Company” box.
- Select the document type.
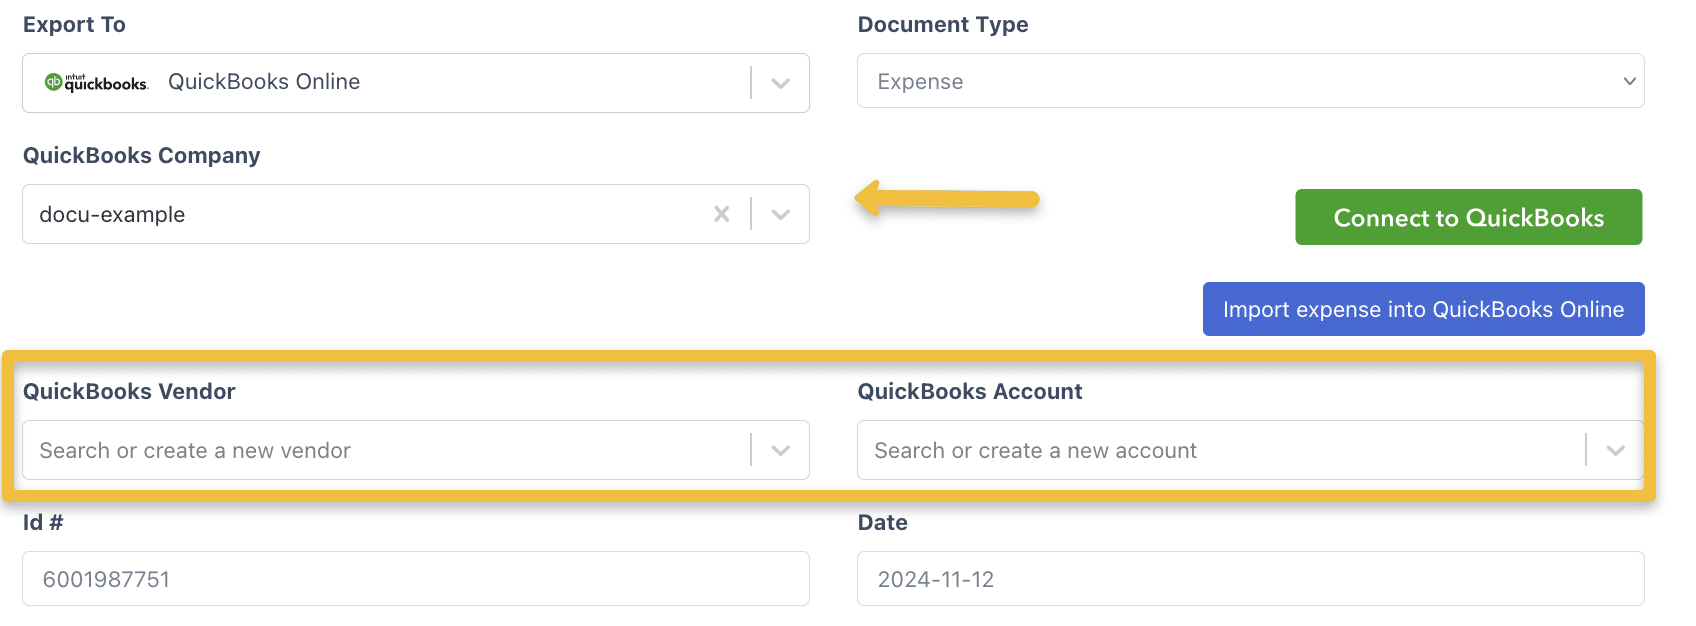
- Select an existing vender or create a new one by typing the name and hitting Enter.
- Edit fields: if necessary, you can edit the invoice number, date, etc.
- Once everything looks good, click on “Import“.
- Check your Import: To check your import in QBO, follow the steps below:
- Log in to your QuickBooks Online account.
- On the left corner click on Sales.
- Go to Invoice.

Note: Email support@docuclipper.com if you run into any issues or have feedback.


