Overview #
The Invoice Rules feature allows you to automate the categorization of your invoices based on specific criteria. This powerful tool can save time and reduce errors in your accounting process by automatically assigning categories or products/services to invoice line items.
Document Types #
Our system supports several document types, each with its own set of fields and rules:
- Payables: Invoices you receive from vendors (bills you need to pay). For QuickBooks Online the document types are Bill and Expense.
- Receivables: Invoices you send to customers (money owed to you). For QuickBooks Online the document type is Invoices
Fields Available for Rules #
The fields available for creating rules depend on the document type:
For Payables, Expense, and Bill: #
- Line Item Description: The description of each line item on the invoice.
- Vendor: The name of the vendor who issued the invoice.
For Receivables and Invoice: #
- Line Item Description: The description of each line item on the invoice.
- Customer: The name of the customer to whom the invoice is issued.
Setting Up Rules #
Accessing the Rules Editor #
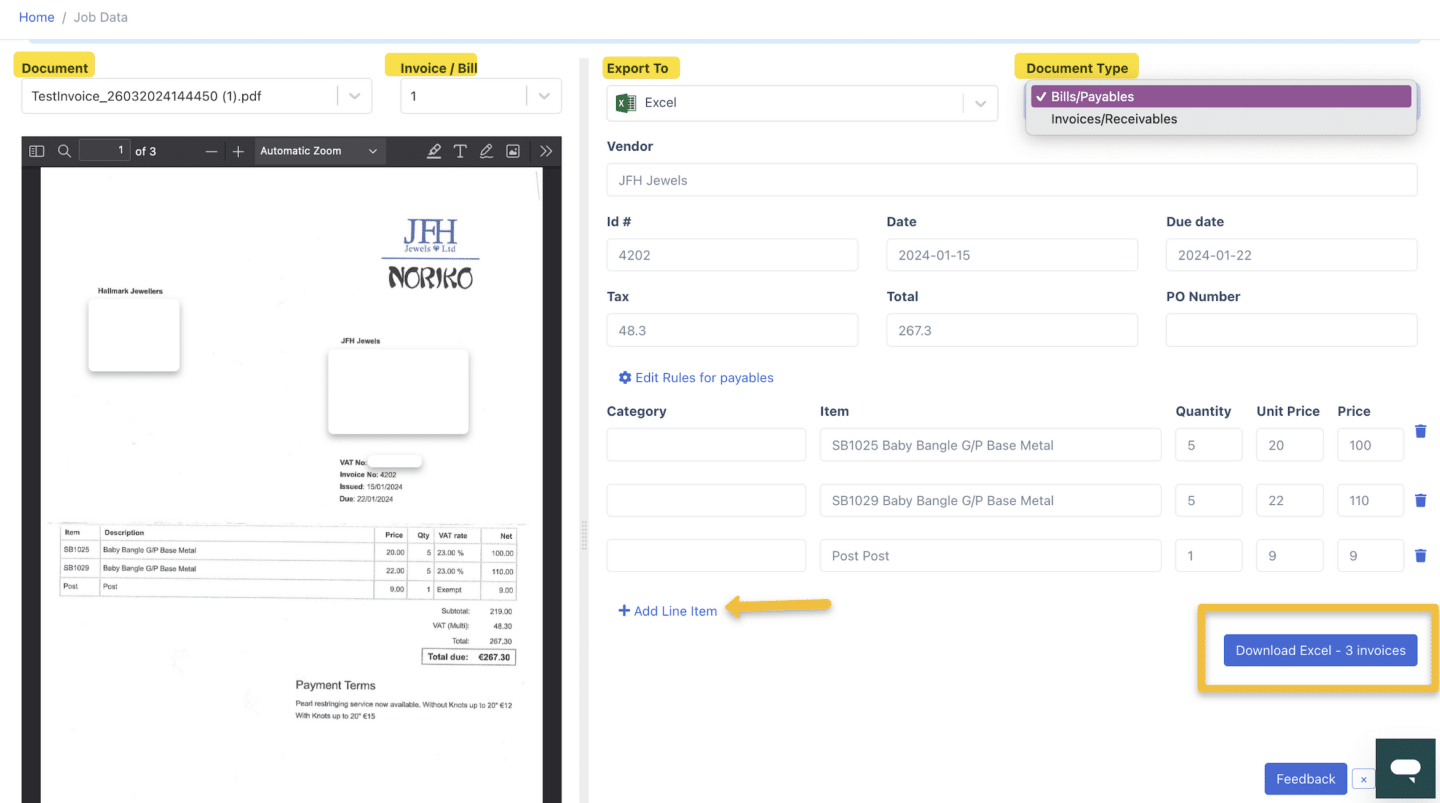
1. Navigate to the Invoice job. Look for a button or link labeled “Edit Rules” or “Manage Invoice Rules”. Click this button to open the Rules Editor modal.
Creating a New Rule #
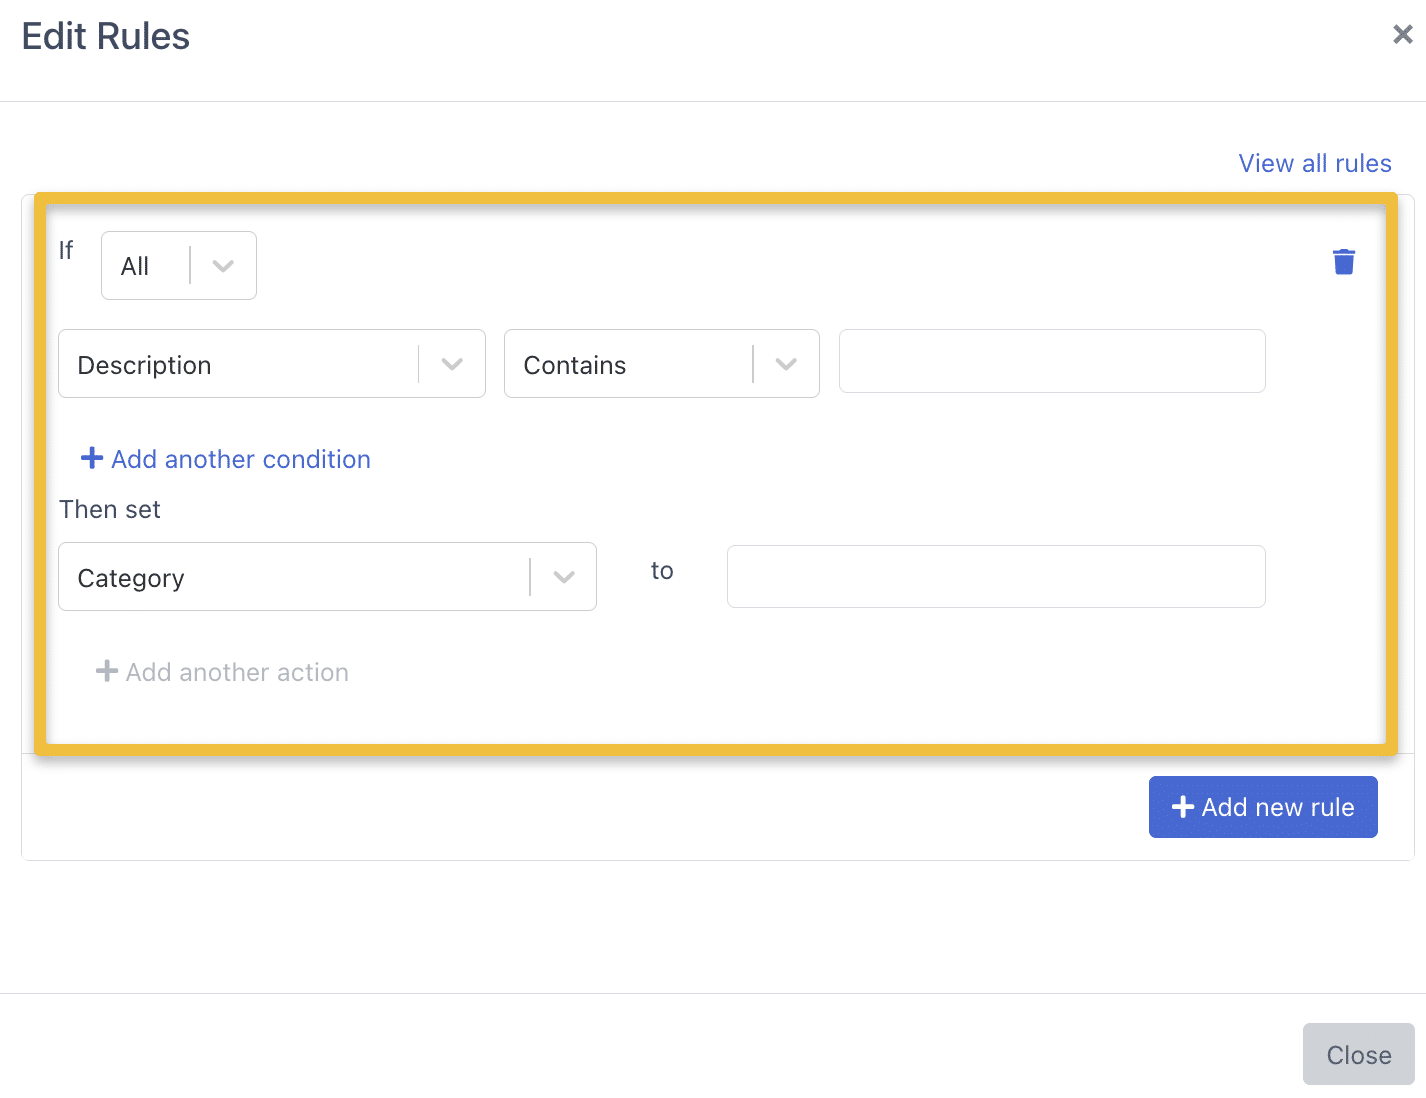
In the Rules Editor, click the “Add new rule” button.You’ll see a new rule card appear with default settings.
Configuring Rule Conditions #
Each rule consists of one or more conditions and an action to take when those conditions are met.
- Select the Field: Choose whether the rule should look at the “Line Item Description”, “Vendor” (for payables), or “Customer” (for receivables).
- Choose the Operator: Select how the field should be evaluated:
- Contains: The field includes the specified text.
- Not Contains: The field does not include the specified text.
- Equals: The field exactly matches the specified text (for Vendor/Customer only).
- Not Equals: The field does not exactly match the specified text (for Vendor/Customer only).
Setting the Action #
- Choose What to Set: Depending on your document type, you’ll set either a “Category” (for payables, expenses, and bills) or a “Product/Service” (for receivables).
- Select the Value: Choose the category or product/service to assign when the conditions are met. For some document types, you may need to type in the value manually.
Saving the Rule #
Once you’ve configured your conditions and action, click the “Add new rule” button at the bottom of the rule card to save it.
Managing Existing Rules #
- View All Rules: When you open the Rules Editor, you’ll see a list of all existing rules.
- Edit a Rule: Click the edit icon next to a rule to modify its conditions or actions.
- Delete a Rule: Click the trash icon next to a rule to remove it.
Best Practices #
- Start Simple: Begin with broad rules and refine them as needed.
- Use Specific Conditions: The more specific your conditions, the more accurate your categorization will be.
- Regular Review: Periodically review your rules to ensure they’re still relevant and accurate.
- Test Your Rules: After creating or modifying rules, test them with a variety of invoices to ensure they’re working as expected.
Troubleshooting #
- If a rule isn’t applying as expected, check that the conditions are correct and that there isn’t a conflicting rule higher in the order.
- Ensure that the values you’re entering match exactly what appears on your invoices (including capitalization for “Equals” conditions).
- If you’re using multiple conditions, make sure you’ve selected the correct combination method (ALL or ANY).
Limitations #
- Rules are applied to new invoices as they are processed. Existing invoices won’t be automatically recategorized if you change the rules.
By effectively using the Invoice Rules feature, you can significantly streamline your invoice processing workflow, reduce manual data entry, and improve the accuracy of your financial categorization.


