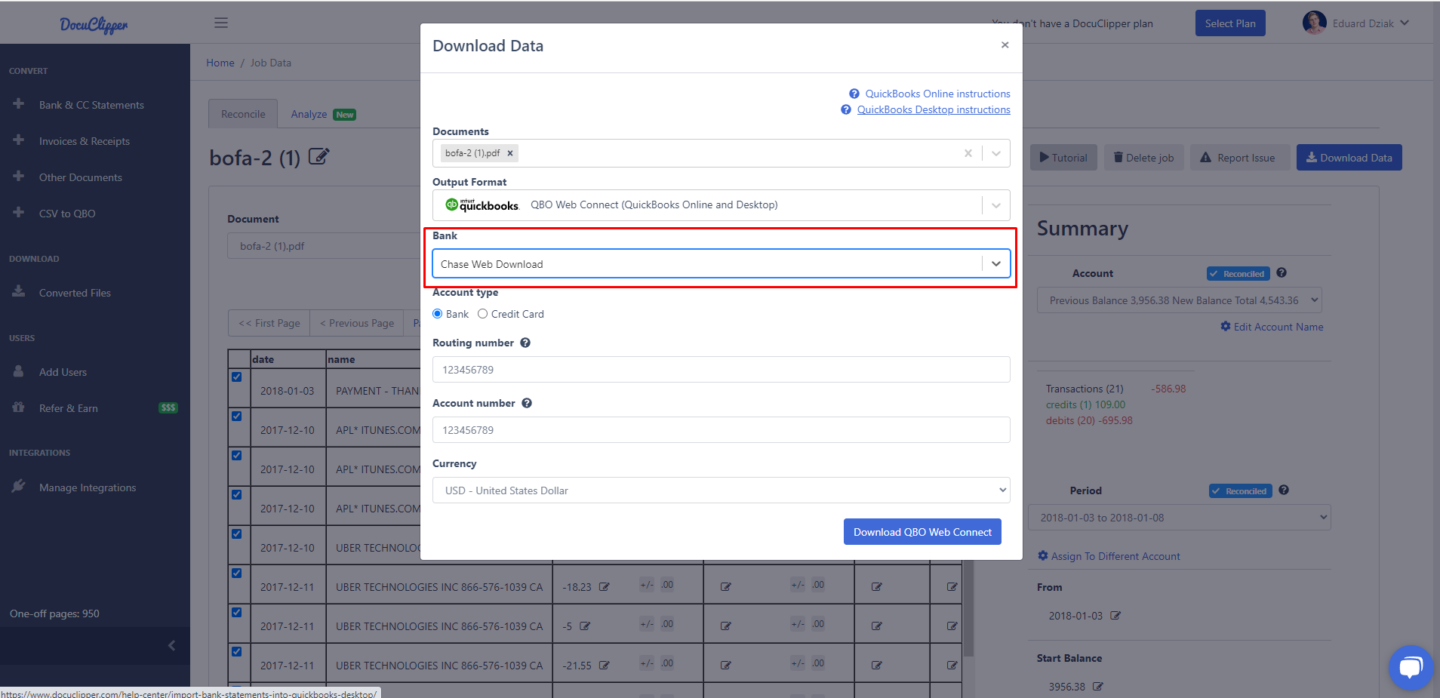
While importing data into QuickBooks from DocuClipper, you may encounter an error message stating “Unable to Verify Financial Institution”. This article will guide you on how to resolve this issue.
Understanding the Error #
The “Unable to Verify Financial Institution” error typically occurs when the bank number in the QBO file isn’t correct. QuickBooks uses this number to identify your bank and facilitate the import process. If the number is incorrect, QuickBooks won’t be able to verify the financial institution, resulting in this error.
How to Resolve the Error #
To resolve this error, follow these steps:
- Choose the Correct Bank: In the dropdown list, select the correct bank associated with your data. Make sure that the bank you select matches the one in your QBO file.
- Select “Chase Web Connect” if Necessary: If you have US Bank and isn’t listed in the dropdown menu or if you’re still encountering the error after selecting the correct bank, choose “Chase Web Download”. This option often resolves the issue by providing a more general import option.
- Select “BMO” if Necessary: If you have Canadian Bank and isn’t listed in the dropdown menu or if you’re still encountering the error after selecting the correct bank, choose “BMO” and update the currency to CAD. This option often resolves the issue by providing a more general import option.

Conclusion #
The “Unable to Verify Financial Institution” error can be a minor setback when importing data into QuickBooks from DocuClipper. However, by ensuring that you’ve selected the correct bank or by using the “Chase Web Connect” option, you can easily resolve this issue and continue with your data import process. If you continue to experience difficulties, don’t hesitate to reach out to our support team for further assistance.


